

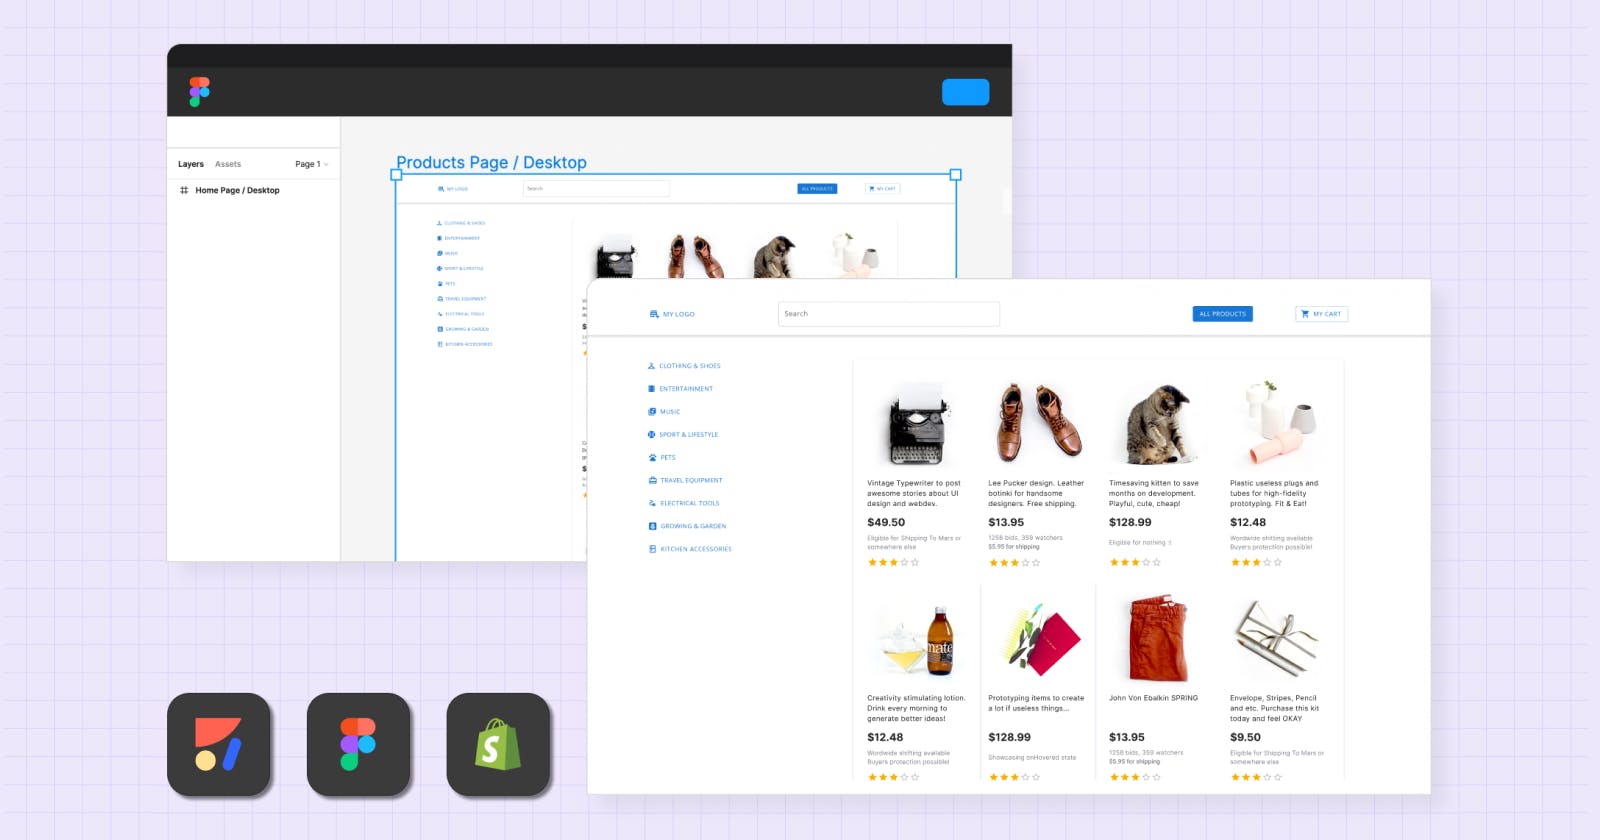
How to build a Shopify store with a custom UI using Figma + Anima
We built a live eCommerce app in Figma using Anima's React Component Library.


Table of contents
- Part one: Make your design interactive
- Part two: Go from Figma to React using Anima
- Part three: Create a Shopify project with Hydrogen
- Part four: Combine Both Projects
- Part five: Connect with Shopify API
- Part six: Add a cart and checkout
- Part seven: Add Tailwind CSS and Make it Responsive
- Part eight: Build & Publish to Netlify
- See for yourself
We built a live eCommerce app in Figma using Anima's React Component Library. Then we turned it into a Shopify template and deployed it on Netlify using Anima's generated code. Here's how.
Before starting
- Sign up to Anima
- Install the plugin for Figma
- Install Node.js
Part one: Make your design interactive
We’ve added a ton of interactive open source React components to our Figma plugin. You can use them to create your own design file or duplicate our sample file to get started.
Step 1: Explore the Component Library
- Open the Anima plugin for Figma.
- Select Component Library.
Step 2: Insert a MUI component
- Select MUI from the Component Library menu.
- Choose the component you want to use and customize it for your application.
- Click insert to add the component to your canvas, then incorporate it into your design.
Part two: Go from Figma to React using Anima
Once you’re happy with your design, you can export it as developer-friendly React code using Anima.
Step 1: Sync to Anima
- Open the plugin in Figma
- Click Preview, then Sync
Step 2: Export React code
- Open your project in the Anima web app and select Export code
- Change Selected Framework to React
- Export code for the entire project
Step 3: Run locally
- Unzip the downloaded code
- Open terminal in the Anima code folder
- Run
npm install - Run
npm start - Open
http://localhost:1234
Part three: Create a Shopify project with Hydrogen
Once you’re happy with your design, you can export it as developer-friendly React code using Anima.
- Use this guide to create another project with the basic Shopify features
- Follow this guide to prepare your Shopify template for deployment to Netlify
Part four: Combine Both Projects
Now we have two projects, one generated by Anima and the other one generated by Shopify’s Hydrogen library. From now on, the Shopify Hydrogen project will be the primary project where all of the files and folders will be merged.
- package.json: Add dependencies from Anima’s project into Shopify’s and run
npm install. - jsconfig.json: Change property jsx from “react” to “react-jsx”.
- src:
- assets: Create new assets folder inside the src folder and move the Anima project’s img and fonts folders into it.
- index.css: Move the Anima project’s globals.css and styleguide.css code into the Shopify project’s index.css.
- components: Move the components folder from Anima’s project into Shopify’s project, and change all Link components to use
@shopify/hydrogeninstead ofreact-router-dom.

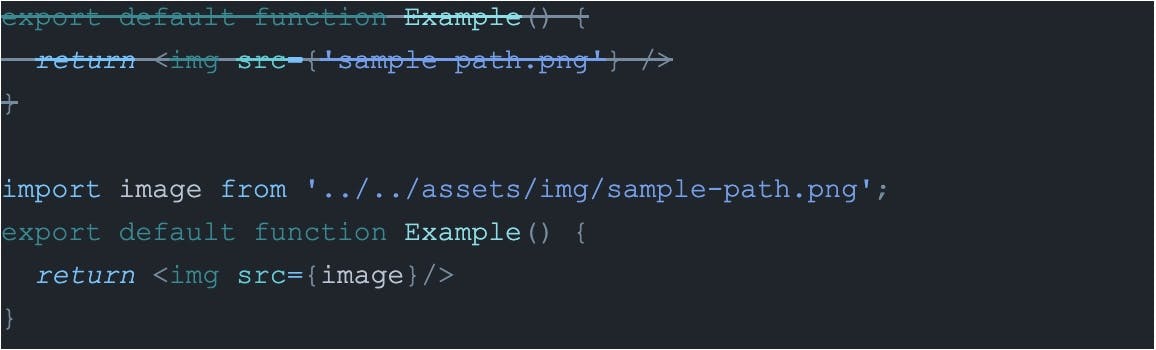
If the component has an image, replace the image source with a variable declared at the top of the file on an import statement (if path is specified by a prop then remove that prop and set the path based on the variable at the constants folder):
4. **routes**: Create new files for each page in the routes folder using [this guide](https://shopify.dev/custom-storefronts/hydrogen/framework/routes) (the index.server.js should be used as the Home Page)
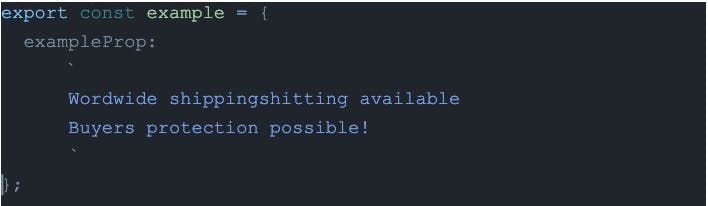
5. **constants**: If Anima’s project has generated multiple variables for the props of each page in the _App.jsx_ file, then create a _constants_ folder in the _src_ folder and add all these variables to its index.client.jsx file. Add **export** before each one, and if any jsx code has been generated inside any of these variables, then remove it.
For example, if you have something like this:
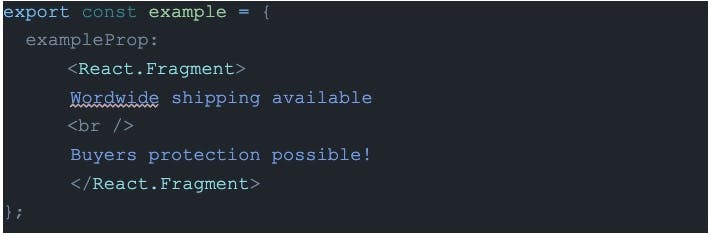
It should be changed to this:
Part five: Connect with Shopify API
- Create a Shopify Partner Account.
- Create a Development Store by following this guide.
- Add some products to this new store (it must have at least one variant).
- Generate a storefront access token by following this guide.
- Add your storefront token and your store domain to hydrogen.config.js.
- Create a query by following this guide, or use this code example to get product data:
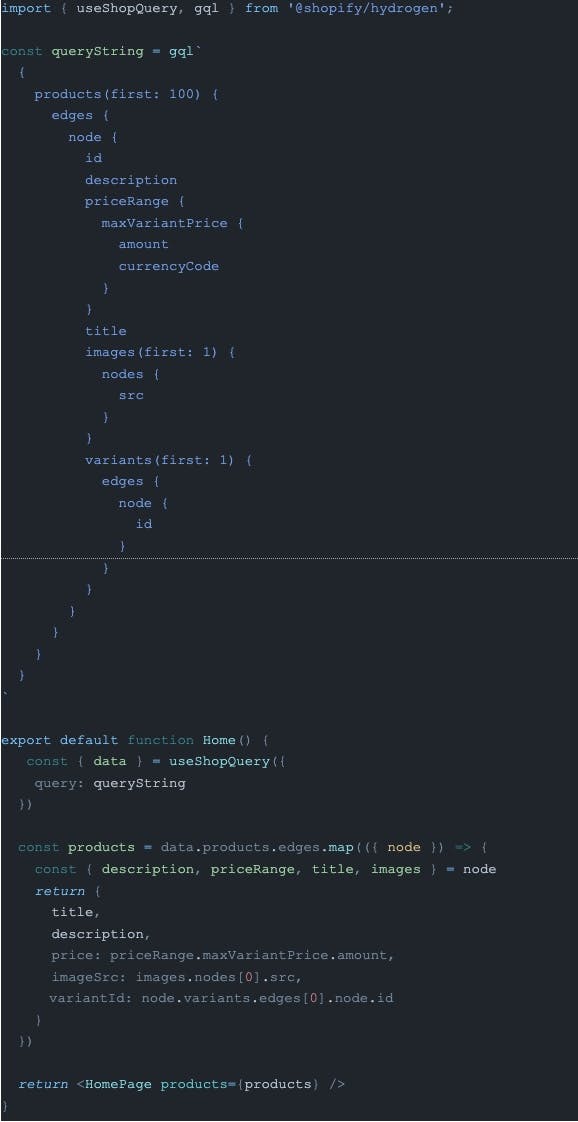
Now in the HomePage you can use the products array for rendering each product card with the actual data from the Shopify store.
Part six: Add a cart and checkout
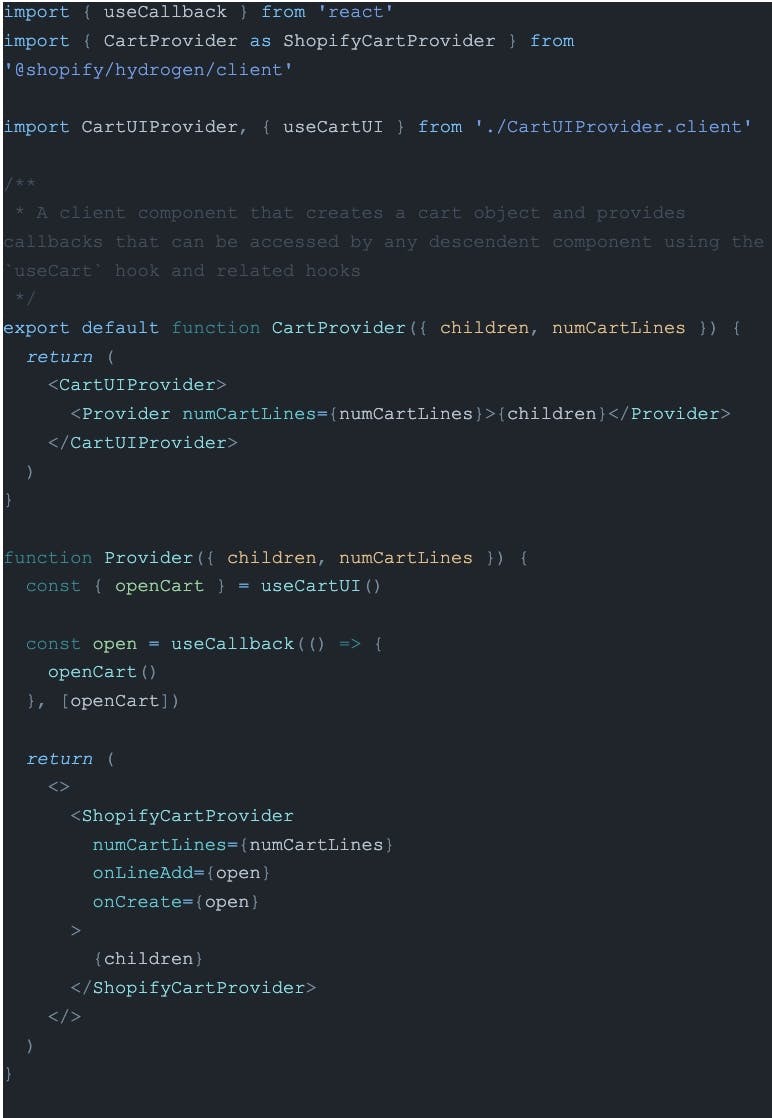
- Create CartProvider.client.jsx inside the components folder with the following code inside:
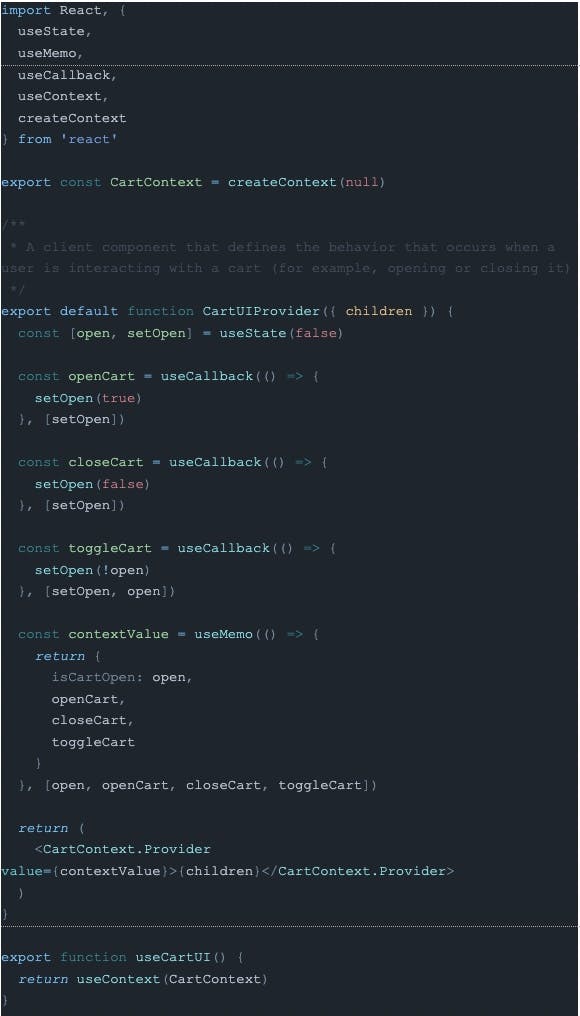
- Create CartUIProvider.client.jsx inside the components folder with the following code inside:
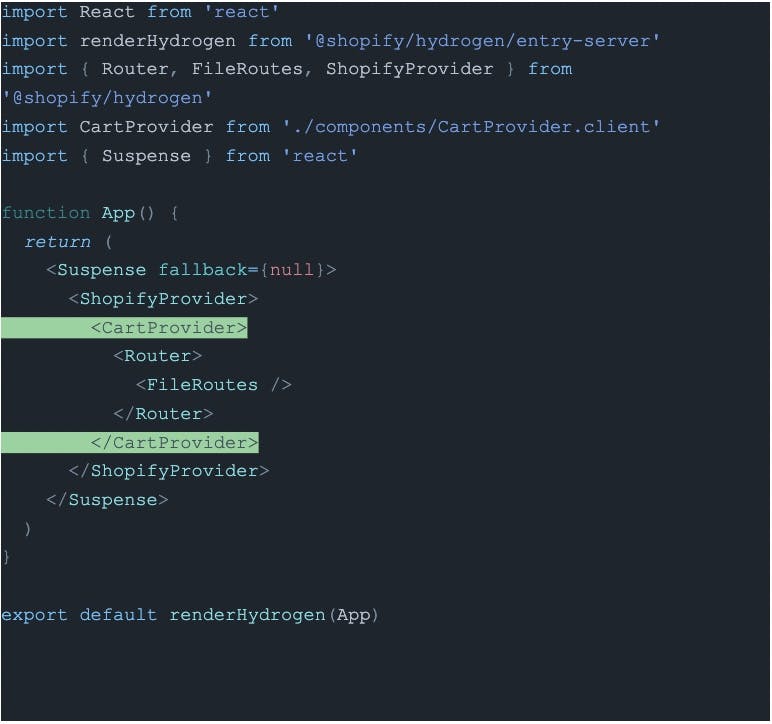
- Add Context to App.server.jsx:
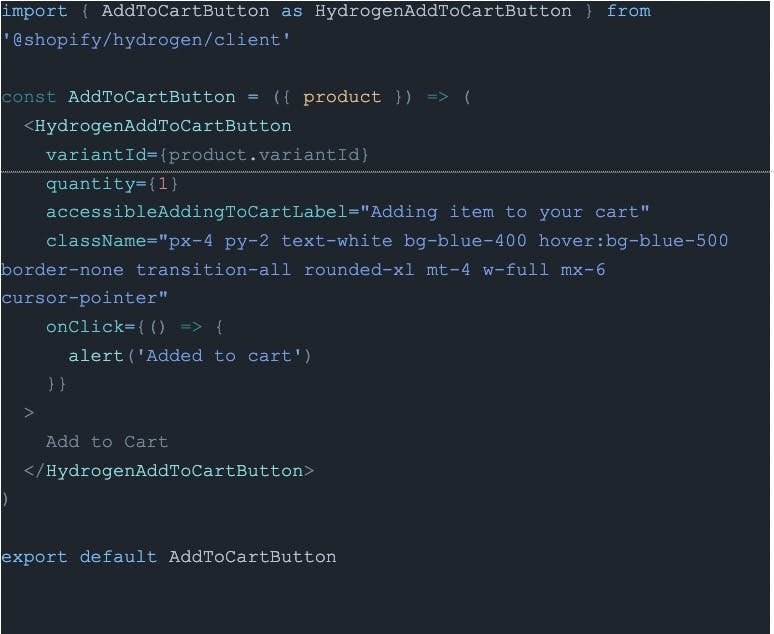
- Create AddToCartButton.client.jsx file inside the components folder with the following code:
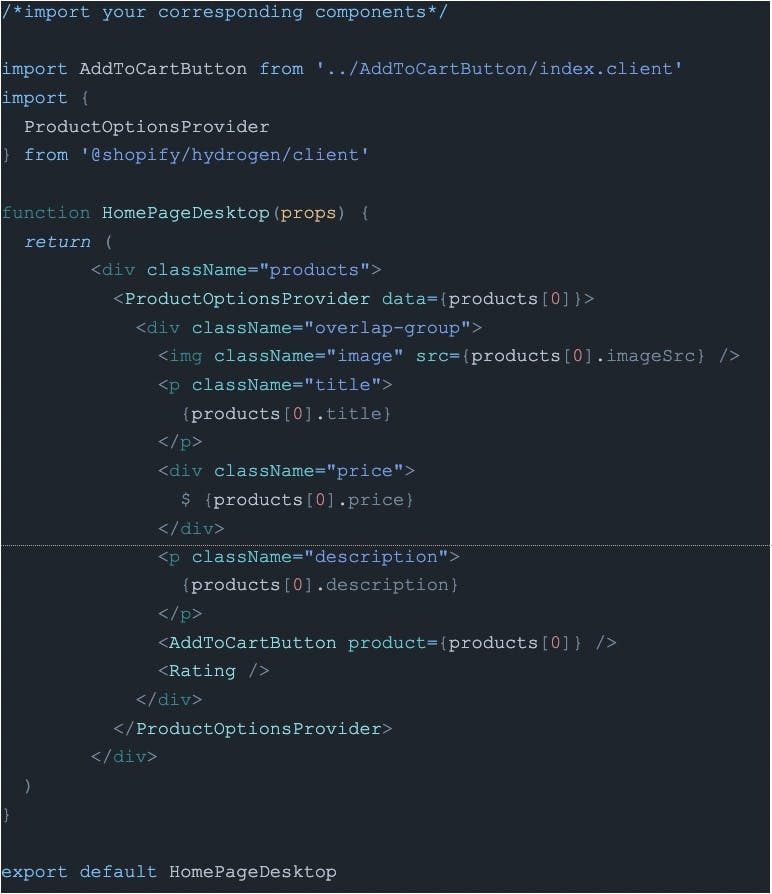
- Wrap every product component with ProductOptionsProvider from
@shopify/hydrogen/client, pass the corresponding product to it, and use the created AddToCartButton:
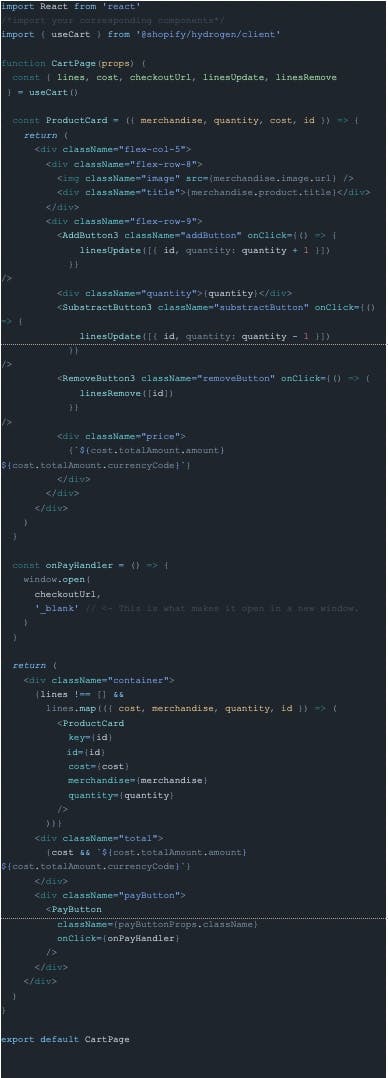
- On the Cart Page we import the
useCarthook from @shopify/hydrogen/client and render each selected product from the lines property (for more info check out this tutorial) then we display the total cost of the cart and add the checkoutUrl to the pay button:
Part seven: Add Tailwind CSS and Make it Responsive
We’ll be using the Tailwind CSS framework to make each page responsive.
- Install tailwind css and its peer dependencies, and generate the tailwind.config.js and postcss.config.js files:
$ npm install -D tailwindcss @tailwindcss/typography postcss autoprefixer $ npx tailwindcss init -p - Add the paths to the template files in your tailwind.config.js file:
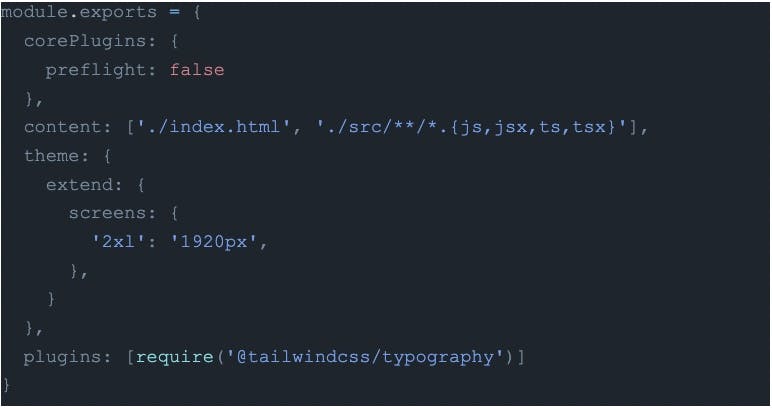
- Add the paths to the template files in your tailwind.config.js file:

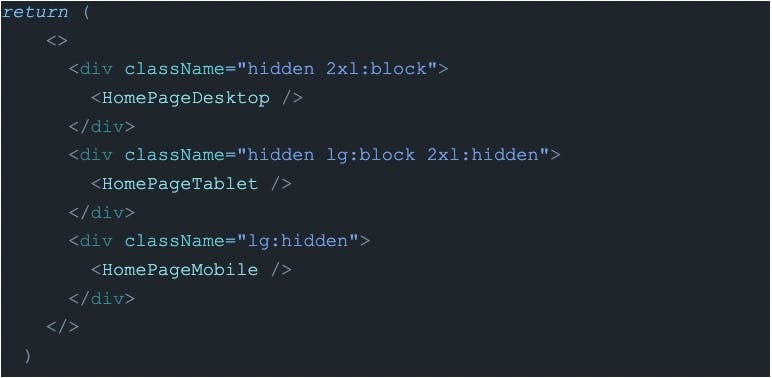
- Make each router page display the corresponding component depending on the screen size. For example:
Part eight: Build & Publish to Netlify
Netlify is a great cloud platform to host React apps. Follow their deployment guide to connect your repo and automatically deploy your app.
Here’s how to deploy to Netlify.
See for yourself
The post How to build a Shopify store with a custom UI using Figma + Anima, written by Ignacio Díaz, appeared first on Anima Blog.